Portable Power
Summary
In principle, a portable solar system is quite simple: Choose from a fold-in-half or multi-sectioned blanket solar panel, choose some sort of battery to store the charge, and then a way to connect things to the battery. Batteries can be Lithium or Lead-acid, and you can put them in plain battery boxes or in boxes with all sorts of outlets already wired into them. So long as you choose your parts properly, everything is plug and play!
Materials Required
| 1 | 12V 100Ah AGM Deep Cycle Battery V2 | SB2560 |
| 1 | 12.8V 100Ah Lithium Deep Cycle Battery | SB2215 |
| 1 | Battery Box to Suit 100Ah SLA | HB8102 |
| 1 | 12.8V 100Ah Lithium Slimline Deep Cycle Battery with Metal Case | SB2220 |
| 1 | Powertech Battery Box with Power Accessories | HB8504 |
| 1 | Powertech DC Control Box for External Battery with Voltage Display | HB8520 |
| 1 | Rovin 12V 120W Blanket Solar Panel | ZM9179 |
| 1 | Rovin 12V 160W Folding Solar Panel | ZM9183 |
| 1 | Bluetti 268Wh Power Station with 600W Inverter - EB3A | MB4002 |
| 1 | Rovin 1.2m Waterproof IP67 White and Orange Flexible LED Strip | ST3956 |
| 1 | Dual 100mm 12V Fans with Clamp Mount | GH1403 |
| 1 | 12V White Kettle - 1L | GH1386 |
| 1 | 500 Lumen USB Rechargeable LED Torch | ST3522 |
| 1 | 35L Brass Monkey Portable Dual Zone Fridge/Freezer with Wheels and Battery Compartment | GH2020 |
Table of Contents
- Solar Blankets and Folding Panels - What is the Difference
- Folding or Blanket Solar Panel?
- To Control Charge, on not to Control Charge
- How do I Choose the Best Portable Power Setup?
- Size Does Matter
- What Is a Deep Cycle Battery?
- Battery Options
- Lithium Versus Lead-Acid - Advantages and Disadvantages
- Battery Ratings
- Battery Boxes and Plugging Things In
- Enclosed Batteries
- Power Stations
- Putting it All Together
For a long time, taking a solar panel camping meant mounting a big solid panel to the roof of your vehicle, trailer, or caravan. In the case of caravans, this is not a big issue. However, on a vehicle, you quickly lose the ability to use roof racks for storage of anything else. The other challenge was that the panels were just the same type that are bolted to house roofs: They have very tough glass on the outside and a solid aluminium frame. This makes them rugged, but heavy and impractical for some situations.
The first solution in recent years was the folding solar panel. These products feature a solar panel like the household type, but in two halves hinged together (sometimes more sections, but rarely). They still have a glass cover panel and an aluminium frame, but both are lighter than the house roof version. After all, why make these panels with glass able to withstand a 20mm hailstone at full speed (which the house roof ones can) when you do not need to?
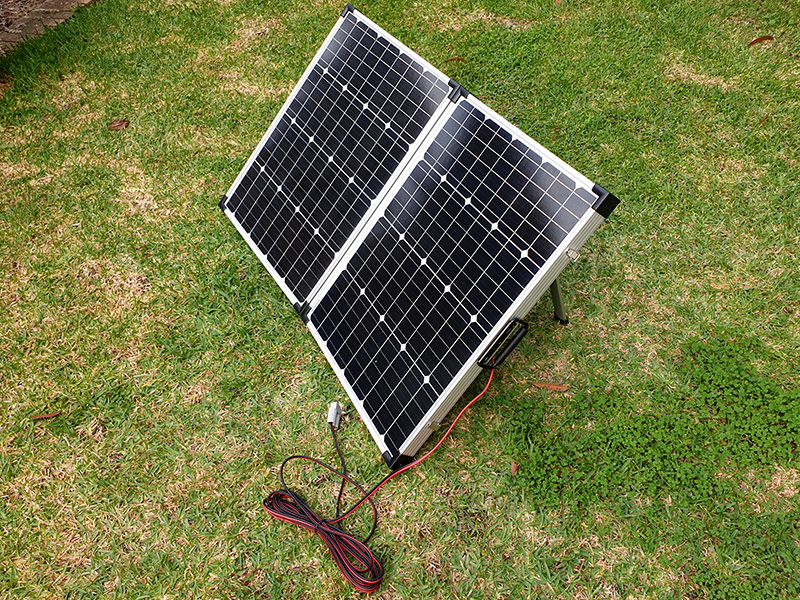
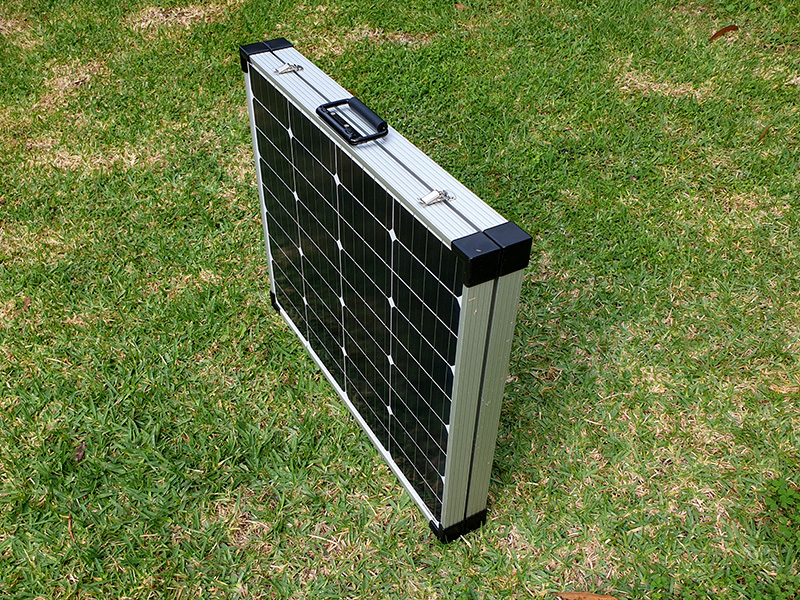
These were, and still are, a great solution to the challenge of making solar-electric systems practical for camping. While heavier and bulkier than the blankets we will cover next, they are more suitable for medium-term setups. They generally have their own stand built in and can be placed in the right spot, a good sun location, and left for weeks if need be.
Solar blankets, on the other hand, pack up to be far smaller and a lot lighter. They are made from a series of smaller solar panels, mounted on a canvas or nylon fabric backing. There are more of these small panels than the folding version, which usually just has two big ones, but they are all connected in such a way as to have a similar output. This means that when you pack up a blanket, the smaller panels fold on each other to make a smaller footprint. They also have a much thinner toughened glass or sometimes plastic cover on each panel. Note that the photo shows a 200W blanket spread out with its accessories, but the folded one is a 120W model that has no regulator. The open one would fold up to a larger footprint than the folded one here.
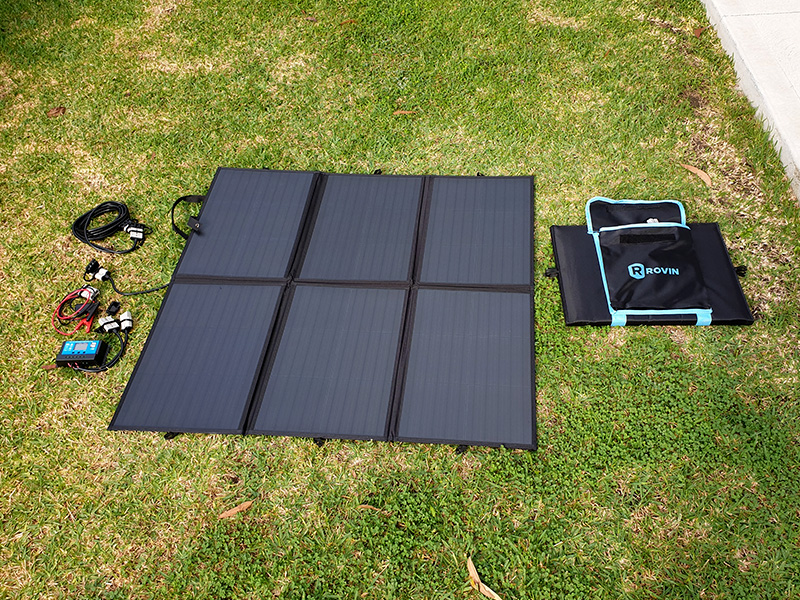
The result is something that can be packed more easily, and set up almost anywhere. You can lay them over luggage stashed on roof racks (provided the vehicle is not moving), over the bonnet or windscreen, or just on the ground, over suitable rocks, or any such support if you want to face them toward the sun. Generally, however, flat on the ground is good enough. The trade-off is that the panels are not as strong, so do not walk on them! The folding panels probably won't take being walked on either but you are less likely to do so because they are not flat on the ground. The other trade-off is that blanket panels are usually more difficult to set up in a way that can be left for a week or more. Flat on the ground, debris will blow or get kicked or thrown onto the panels, partly obscuring them. They are easy to walk on accidentally, too. Most other placement options, like over the car bonnet, are temporary by nature.
The question of whether to buy a folding panel or a blanket panel is a matter of how you plan to use it. As noted above, if you camp in one spot for a week or more and leave everything set up, you may benefit from a folding panel. However, they are bulky and somewhat heavy. If you move around a lot, or just want to save space and weight, a blanket panel is more likely your best option. There is no 'right' and 'wrong', it is a matter of personal preference and what features and benefits of each suit you or are less relevant to you.
Some solar panels, both folding or blanket, some with an in-built charge controller, and some do not. This is an important point to consider, as all batteries need some sort of charge controller to charge the battery without damaging it. An uncontrolled solar panel may pump in too much power in good conditions, or if less than normal has been drawn from the battery. Different types of battery are damaged in different ways by this. At best, this results in a battery with a reduced capacity. Sometimes, this results in a ruined battery and in rare cases, it can cause a fire.
Why, then, might you want a solar panel with no controller? The answer lies in battery and housing choice. Some battery types have different charging requirements to others. Lithium batteries, for example, have different charging requirements than Absorbed Glass Mat (AGM) Lead-acid batteries. Some battery boxes that have plugs, sockets, voltmeters and the like in them also have internal charge controllers. Further, you may wish to use your solar panel with the DC-DC charger already installed in a car or 4WD auxiliary/second battery setup, and thus a charge controller built into the panel can cause conflict. Another great example are all-in-one power stations, which feature a battery, inverter, and 12V and USB outlets all in one housing. These also usually have a charge controller in them.
Some charge controllers are simple, while others are complex. Some are meant for a certain type of battery while others are capable of dealing with different battery chemistries. At a basic level, a charge controller should have a way of sensing when the battery is charged, and to cut off when this point is reached. The next desirable point is voltage regulation. The voltage out of a panel can reach up to 18V when there is little load on it, like a mostly-charged battery. Most 12V batteries should only be charged at 14.4V or 14.8V. The next point is whether the charger is suitable for your battery type. Many Lithium batteries have internal Battery Management Systems (BMS) built in and so can take a reasonably unprocessed input voltage (as long as it is not too high) and charge the cells inside. However, this voltage may need to be a little higher than the charge voltage for, say, a GEL or AGM battery.
If you have any doubts, the best way to get solid answers is to speak with a Jaycar expert in-store, or online or over the phone.
The key to buying a good portable power setup is planning. While this might all be a bit bewildering for some people, please read it anyway - even if it does not make much sense, you will know what questions to ask and what information to bring to talk to our expert staff in store!
First of all, make a list of everything you want to plug into your battery, and how much current it uses. Things like phone charging is almost incidental but if you are going to charge ten phones, then factor it in. Laptops, fridges, campsite lighting, or anything bigger than a phone or torch really needs to be planned in. Think about how long each appliance runs for. Your fridge, for example, will run its compressor more if it is opened often.
Once you know how much current you will need and for how long, you have an idea of how many amps of current for how many hours. Read on for more details on battery capacity and the rating of Amp-Hours (Ah). With that, you can choose a battery. As you will see further on, a 100Ah battery cannot supply 100A for one hour, nor can it supply 20A for five hours. The rating is total capacity but not all of the capacity is usable. Different batteries behave differently and we have more details on that soon, too. So, based on your needs, you will choose a suitable sized battery.
Next, choose a battery and housing. The battery type will determine whether or not you need a solar panel with a charge controller built in. Again, we have more details elsewhere in this article, but in short, Lead-acid batteries need a good charge controller, while Lithium batteries have internal circuitry and can cope with less sophistication. If you are using an all-in-one type Power Station battery, these have controllers built in, so choose a panel that does not have a controller with it. Some housings and battery containers also have a charge controller, while enclosed batteries also often have a controller.
With a battery and housing chosen, you can choose a solar panel. The solar panel needs to put back into the battery what you take out at night, plus anything you use during the day as well while the battery is charging, all during the available daylight hours excluding early morning and late afternoon when the sun is too weak. This will dictate the size of your solar panel. Bear in mind that the number of Watts (W) a panel produces is in ideal conditions and in normal use, it will often output less. As noted above, knowing whether or not you need your panel to have a charge controller built in also helps choose which panel to buy. With this information, you can check out the available range and choose the closest sized panel of your chosen type: Folding or blanket, controller or no controller. Remember, always go up in size (within reason), not down. So, if you have calculated that you need 140W of solar power, get a 160W panel, not a 120W.
Finally, check the connections and make sure you get any adaptors, extension cables, and plugs and sockets you might need to make everything connect.
The size of the solar panel you choose is not only a matter of cost. It must be big enough to replace all the power you use while the sun does not shine, as well as generate what you do use while the panel is working. However, there is such a thing as 'too big'. Some charge controllers have a maximum input, like those in the power station featured in some of the photos. It has a maximum input of 100W. So, we can get away with a 110W panel (which will rarely produce 100% of its rated power) but not a 160W and definitely not a 400W! These controllers need to be used with an unregulated (uncontrolled) panel because the charge controller in the power station will not recognise the output from a charge controller inbuilt to a panel, and therefore may not charge. Some sophisticated models will work, so ask the expert staff about your specific choices.
Size also matters when choosing a controller. If the charge controller in your solar panel is meant for, say, a 50Ah battery, it may not be able to sense a 200Ah battery properly because its electrical characteristics are different. Likewise, a 50W solar panel and a 5A charge controller will never properly charge a 200Ah battery that is flat. Your choices need to reflect the whole system, not just a single part thereof.
Deep cycle refers to how much of the energy stored in a battery can be taken out without damaging it, and also without making the battery unusable. When any battery is used, and stored energy taken out, the voltage of the battery falls. Some batteries can only have a small amount of their energy taken out before the voltage falls to unusable levels. Others can have most of it taken. The basic Lead-acid flooded or wet car battery can only have about 10% of its capacity drawn off before the voltage falls below around 10V, and starts damaging the cells inside.
On the other hand, many Lithium batteries can have 60% or more of their capacity drawn before the voltage falls below a usable level, and even more before the cells are damaged. Some specifically-designed deep cycle Lithium batteries can even be drawn down to 20% of their rated capacity! Lead-acid deep cycle batteries are somewhere in the middle.
The other thing that defines a deep cycle battery is that the voltage stays more level and consistent across the rated amount of discharge, before falling after that, when compared to a regular battery which has a drop in voltage, even slightly, almost immediately.
The numbers vary between batteries, even in the same category. So, when shopping, ask the expert staff about the lowest voltage the battery can be discharged to without being damaged; the amount of the rated capacity that can be used (usually a percentage: No battery can be discharged to 100% of its capacity); and the maximum discharge current, which also varies. While you cannot discharge a wet or flooded Lead-acid battery very far, you can draw a lot of current at once, which is why they are used as starter batteries. You cannot do this with deep-cycle batteries. It is important to know the maximum if you are planning to, say, run a winch off this kind of battery.
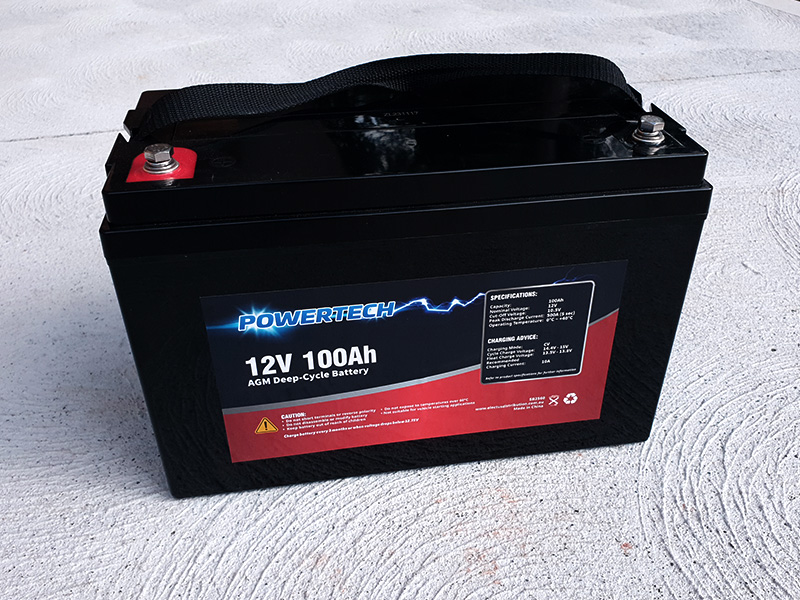
The main choices for storing the electricity your solar panel produces is between a Lead-acid battery, and a Lithium battery. There are subtypes for each, but Lead-acid has the greatest number of variants. The most basic is wet or flooded, where the plates of Lead are bathed in a liquid sulphuric acid. These are regular car batteries and should NEVER be used for camping. They are not deep-cycle, do not actually hold a real lot of capacity, and most importantly, they are dangerous. They can leak easily, and they vent explosive hydrogen when charging. Even the 'sealed' or 'maintenance-free' types used in modern cars vent hydrogen.
The second variety is gel Lead-acid, or Sealed Lead Acid (SLA) batteries. These have a gelled acid, and so cannot spill. They vent less hydrogen, too, but still some. They are still not really suitable for camping, as they are not usually deep-cycle, and those that are are not usually very big. Without going into a big chemistry and physics lesson, there are other reasons gelled batteries are not a great camping option. This is why they are generally found in sizes of 50Ah and under.
Next in line is the Absorbed Glass Mat (AGM) battery. This is a Lead-acid battery where the acid is absorbed into a fibreglass matting between the battery plates. They are spill-proof and vent the least hydrogen, as the fibre structure absorbs most of it. They are almost always deep-cycle, and that is reflected in the battery capacities available: It is rare to find a 7Ah AGM, for example, but quite common to find them in 100Ah and above.
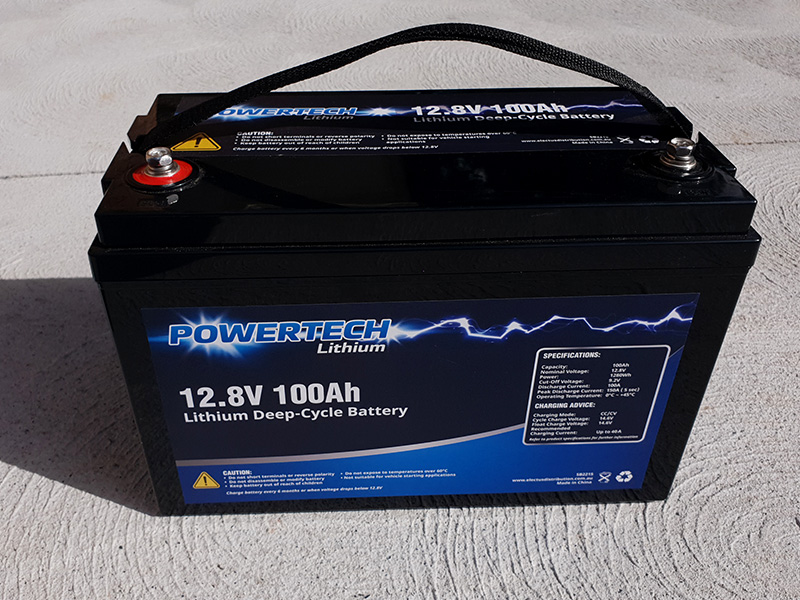
The most common Lithium battery chemistry is Lithium Cobalt. If the battery does not specify its chemistry, it most likely is a Lithium Cobalt version. The major advantage of these is energy density. All Lithium chemistries are much, much lighter than the equivalent Lead-acid chemistry and Lithium Cobalt is the densest of all. That means the amount of energy that a given amount of the material holds. That said, Lithium batteries intended to perform the same roles as Lead-acid batteries are usually made in the same case sizes. That way, they can use the same boxes, brackets, and shelves. So, a 100Ah Lithium battery will be the same size as a 100Ah Lead-acid battery, just much lighter. Inside the plastic box are some foam packers, and space for the battery management circuit.
However, Lithium Cobalt has one major disadvantage: It is very flammable. Even slight impurities in the chemistry can result in fires while charging. The alternative is Lithium-Iron-Phosphate, or Lithium-Ferro Phosphate (Ferro being the scientific word for iron-bearing or iron-based), with the chemical designation LiFePO4. These hold a little less energy for a given mass, but that is less important in a Lead-acid replacement battery than in, say, a mobile phone. For slightly increased weight, you get the very big advantage that LiFeO4 does not burn. You won't even notice the size increase because there is still space to spare in the plastic case!
Lithium batteries are lighter than Lead-acid batteries, and they do not vent hydrogen gas during charging. Almost all Lithium deep-cycle batteries have an internal Battery Management System, which is a circuit that balances the charge between the cells. Lithium 12V batteries have four 3.2V cells in series for a total of 12.8V, and as many groups of four in parallel as is needed. The charging of this requires a sophisticated built-in circuit. So, while it's there, most manufacturers also built in over-discharge protection which cuts off the battery when it is getting flat enough to be damaged, and they also protect against drawing too much current out, too. That means they are virtually short-circuit proof as well. They can be discharged more deeply than Lead-acid batteries, and maintain a more stable voltage across the discharge.
Lead-acid batteries, on the other hand, are raw, meaning the cells inside are connected directly to the terminals you see on the outside. If they are short-circuited, they will discharge enough current to damage themselves and even become a welder: There is no current-limiting. There is nothing to stop them being discharged far enough to be damaged, either, below their safe voltage. They are heavier and even the fully sealed types vent a little bit of hydrogen. You cannot discharge them as far as Lithium batteries, and they are more prone to damage on an internal chemical level.
So then, why would anyone buy one? The simple answer is, they are much more affordable. While Lithium is great and the prices are coming down, Lead-acid is still much cheaper and for many people, it is good enough. This is even more true if you combine it with a battery box or power distributor that has under-voltage, over-discharge, and short-circuit protection built in. You can also add inline plug-in protection units which monitor battery voltage and prevent short-circuits, over-discharge, and over-current, giving you much of the benefit of a Lithium battery's battery management system.
We have mentioned battery capacity ratings a fair bit, in Ah, or Amp-Hours. This is a very misunderstood rating, even among 'experts' like some car battery retailers. It is a standardised way of comparing batteries but it is not a measure of how much energy you can use. It is an industry standard of how much current can be drawn from a battery, measured over twenty hours, and is the same standard for all sorts of batteries, not just deep-cycle camping and car batteries. However, it does not include any criteria for the battery voltage to stay above a usable level. It is calculated until the battery is dead flat, which will kill most batteries.
In addition, the faster you draw current out of a battery, the less real capacity it actually has because of a whole bunch of internal physics and chemistry reasons. So, if you draw 50A out of a 100Ah battery, it will last quite a bit less than two hours! This is both because of the internal battery stuff, and because you cannot use the battery down to 0V like in the testing that gives the Ah numbers. So, even if a 100Ah battery could supply 100A without all that internal science stuff reducing how much it can give at 100A draw, the battery voltage would fall below a usable voltage (around 11V for a 12V battery) well before that one hour was up.
While batteries vary, as a general rule, AGM batteries can be discharged to around 50% of their rated capacity, while Lithium deep cycles can discharge to around 85%. There is serious debate on this topic, but much of it centres around household systems which have a complicated circuit to keep a constant voltage output no matter the battery voltage. The percentages we quoted are for a battery on its own to not fall below around 11V, not the absolute, true 'Depth of Discharge' as it is known.
The best way is to check the data sheet for your specific battery and see at what point the voltage falls too low, or ask our expert staff.
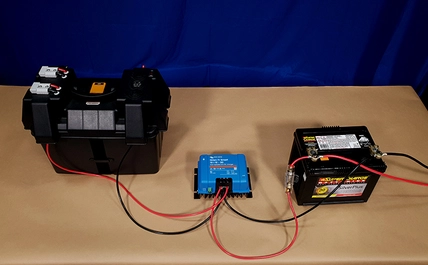
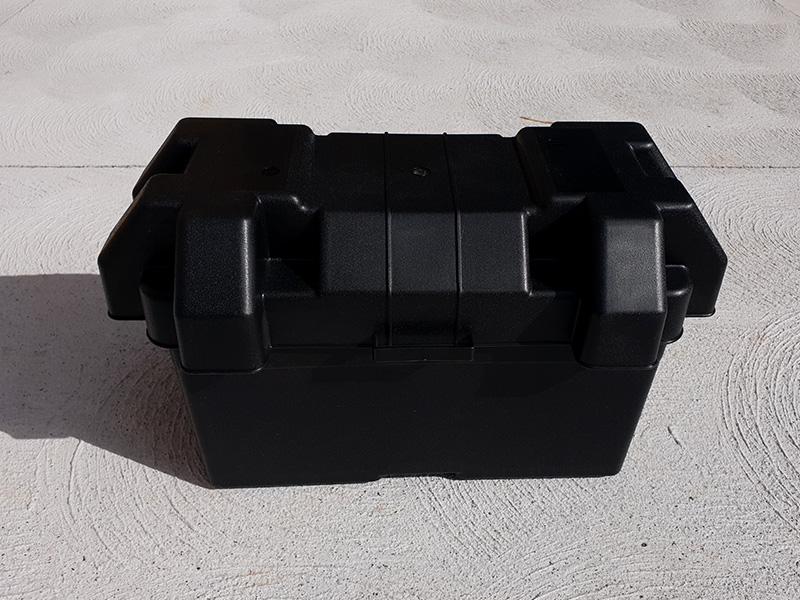
Once you have chosen a battery, you will need something to put it in. Unless it is secured in an enclosed area of a vehicle, you will likely need a battery box. Not only does this help protect the battery from damage and make it much easier to move, it protects the exposed terminals from contact with anything else. There are two main flavours of battery box. The vanilla version is a plain plastic box, sometimes with two terminals on it. The box has an internal strap to secure the battery, and usually an external point to strap the box down, along with a handle.
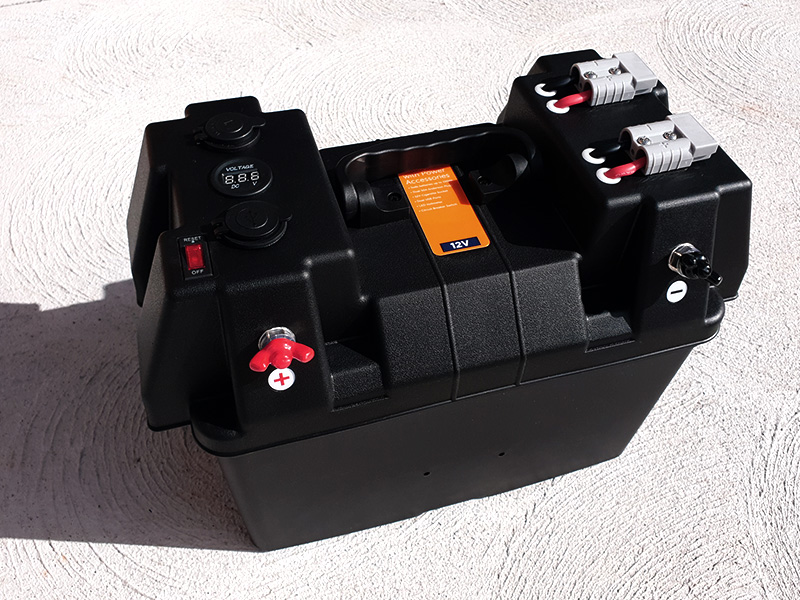
The spiced version has extras. In addition to the features of the vanilla flavour, this one has terminals on the outside, along with various connections. At a minimum, most have a cigarette-lighter socket or two, and one or more high-current (Anderson®-compatible) connectors. All of these are wired to leads with eyelets to connect to the battery terminals. This type enables you to connect devices directly to the enclosed battery. The high-current connectors are great for adding a solar panel, and for running fridges and similar things. The 12V cigarette-lighter sockets can run any in-car devices like LED strips, radio chargers, or small inverters, while many boxes feature USB outputs to directly charge phones and tablets.
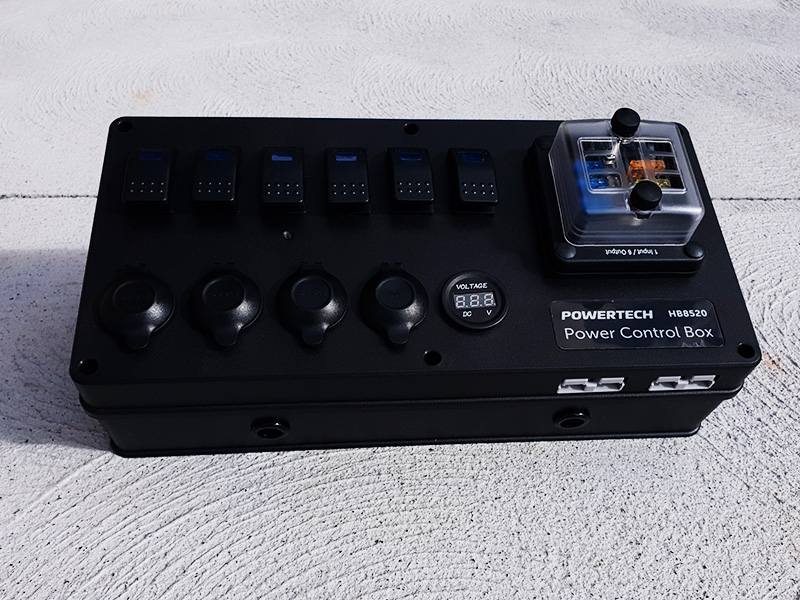
Sometimes you need more outputs than even the advanced battery boxes have. In this case, you can use a plain battery box and one of these external distributors. They have even more outlets than the all-in-one battery boxes do, with the addition of individual switching and sometimes, protection circuitry as discussed above. These are wired directly to the battery terminals through the fuse box included, or to the terminals on some battery boxes. The one pictured has fused cigarette lighter sockets, as well as switches which you can wire to your own outputs, along with two fused high-current connectors and two USB outputs.
All of these options can be used with any battery, Lithium or Lead-acid, that you can fit into them.
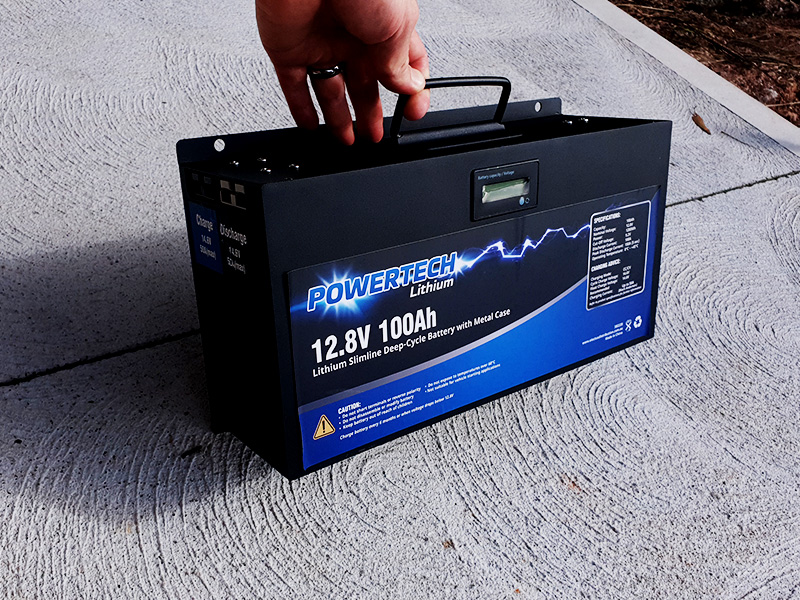
On the Lithium battery front, there is one more option. This 100Ah version is in its own metal box. It is a different shape because it is not trying to be a Lead-acid replacement, and as such, does not have any vacant space inside. It has an input for charging, two outputs, and an internal charge controller as part of the battery management system. A solar panel with a 50A high-current connector can plug straight into the side, and there is a small display to monitor battery state. This kind of battery is even more portable and rugged than the battery box version, but it does need to be used with a distributor system like the one featured above if you are using it as a campsite battery.
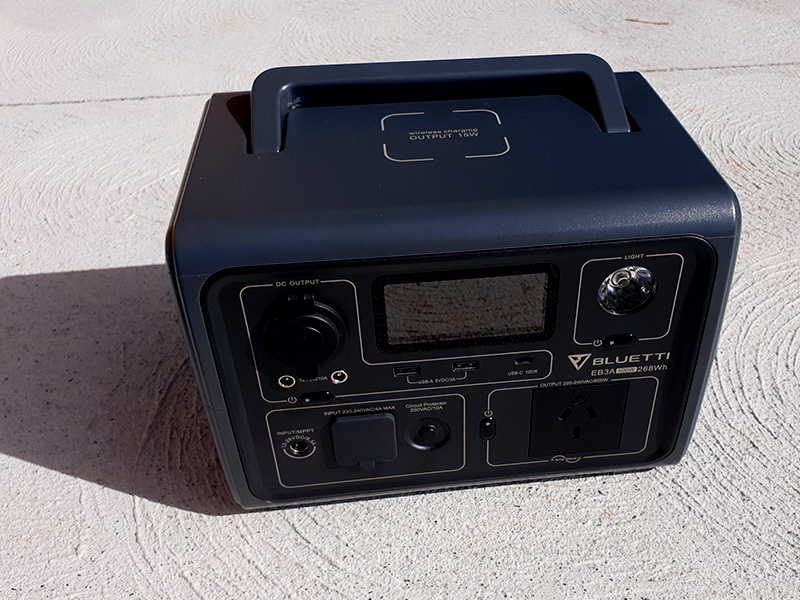
One final option for both energy storage and device connection is something commonly called a 'power station'. These feature an internal Lithium battery, inverter to turn 12V DC into 230V AC (household mains power) and a selection of 12V and USB outlets. They are an all-in-one solution because they generally have a solar input (albeit sometimes not with a 50A high-current connector but rather a proprietary or other kind of connector) and an internal charge controller that also handles battery health. They are made not to over-discharge, over-charge, or short-circuit. They are also available in a variety of sizes and output options.
Now that we know how to choose the bits and pieces we need to power our campsite, let's look at a few options. It is almost impossible to take a photograph which shows the whole solar panel but still has enough detail to show the connections, so in most of these images, you will only see part of the panel. Also in many of the images, we set things up on a canvas-backed picnic blanket to keep everything clean.
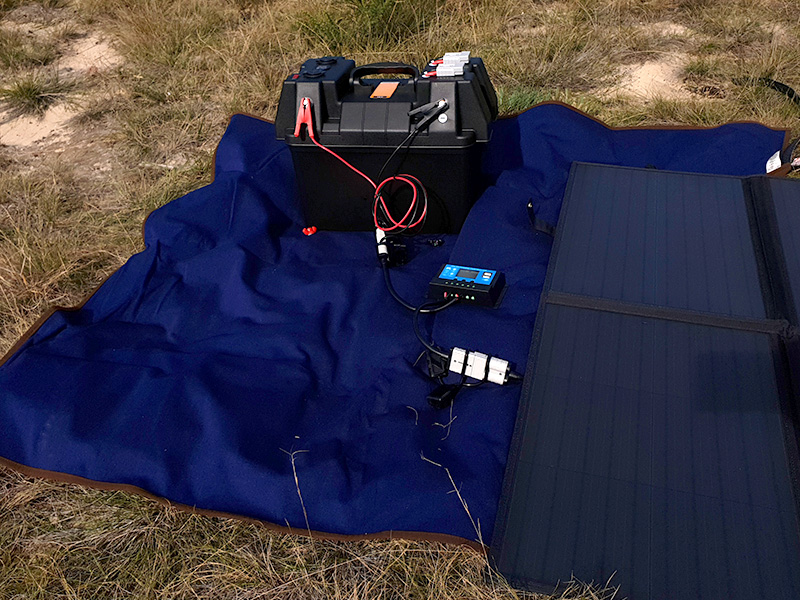
In this image, we are using a 200W blanket solar panel, which comes with a charge controller. The charge controller is supplied with high current (Anderson®-style) connectors pre wired into it, as is the solar panel. This kind of wiring is pretty common among portable solar products. We have a 100Ah Lithium battery inside the battery box, which is a unit with multiple high current, cigarette lighter socket, and USB connections already installed on it. There is no reason to stop you using an AGM Lead-acid battery in the same box, but we had to carry this a fair way from the car!
This particular solar panel came with a variety of leads and adaptors. All we needed to do was place the battery in the box, strap it in, and use the nuts and bolts on the battery terminals to secure the battery box's eye terminal leads. Then, we clipped on the high-current to crocodile clip lead into the charge controller output and clipped it to the battery box terminals. All that was left then was to lay out the solar panel, and plug the input lead from the charge controller into the high-current connector on a flylead from the back of the panel.
It is worth noting that we could have also plugged the charge controller high-current connector output directly into one of the two matching connectors on the top of the box, but we wanted to keep these for adding appliances later.
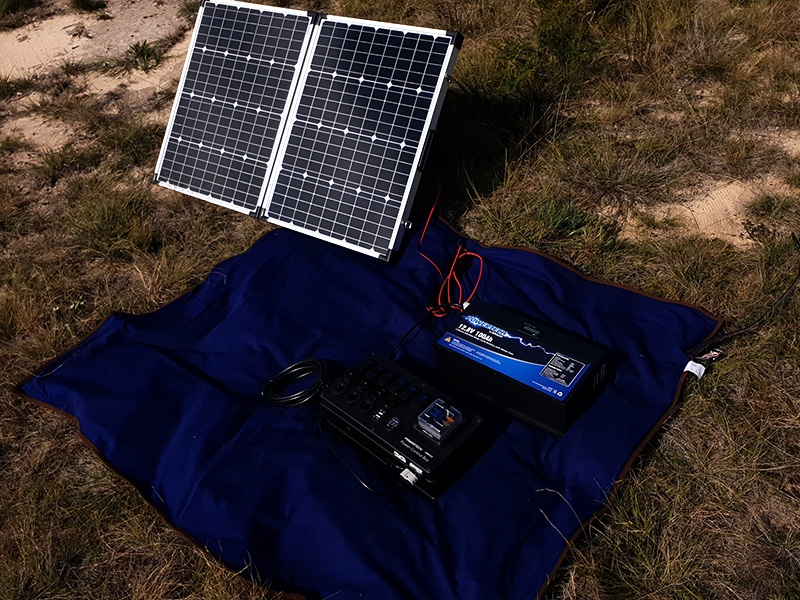
The setup involves a 160W folding solar panel, and you can clearly see how the inbuilt stand gives the folding panel a better sun position. We are using the metal-cased 100Ah Lithium battery which has one dedicated high-current 'charge' connector for solar input, and two 'discharge' high-current connectors for connecting loads. Because the metal-cased Lithium battery has its own internal circuitry, the basic charge controller glued to the back of the solar panel is plenty of regulation. The output lead from the panel is already terminated in a high-current connector, so we just plugged it into the 'charge' port on the battery. From one of the 'discharge' ports, we connected a distribution box with a high-current to high-current connector lead.
The distribution box has a volt meter, three cigarette-lighter sockets, a double 2.4A USB port, and two high-current connectors. It also has a fuse box. Normally, you would open it up, wire a high-current lead directly to the fuse box input, and run the lead out one of the grommets in the case. However, we forgot the screwdriver! The distribution box is very protected with each output fused, and individually switched.
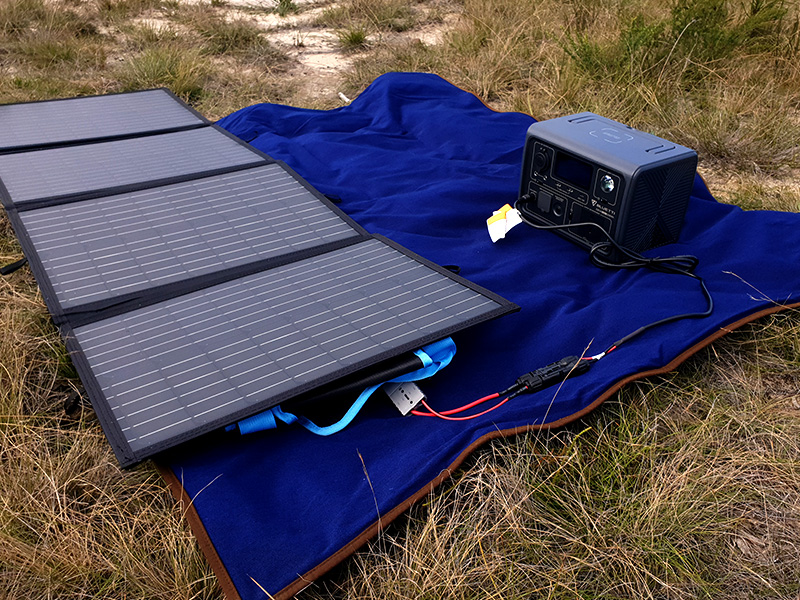
This example uses a Power Station, which has an internal battery, 12V DC to 230V AC inverter, Cigarette and DC plug 12V outlets, and USB outlets. It also has an internal controller and a solar input. The solar input has a reversed wiring, so you can see an adaptor lead in the photo. The solar panel chosen here is a 120W model, slightly overpowered for the 100W max input of this power station. However, maximum output is only achieved in good light at the right angle. We have this one laying flat on the ground on a very hazy day, so output was actually just under 90W when the light was bright.
The solar panel has the usual high-current connector output, but this particular panel has no charge controller included. That's perfect for storage like power stations and battery boxes that have controllers, because connecting two charge controllers in series rarely works well!
The setup was very simple. We plugged the adaptor lead into the panel, and the power station's charger lead into the adaptor, and into the station's input at the other end!
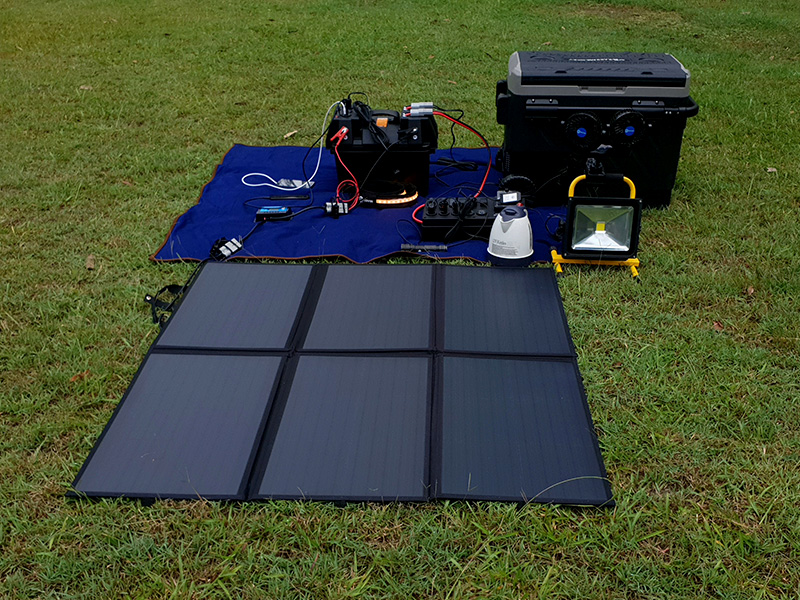
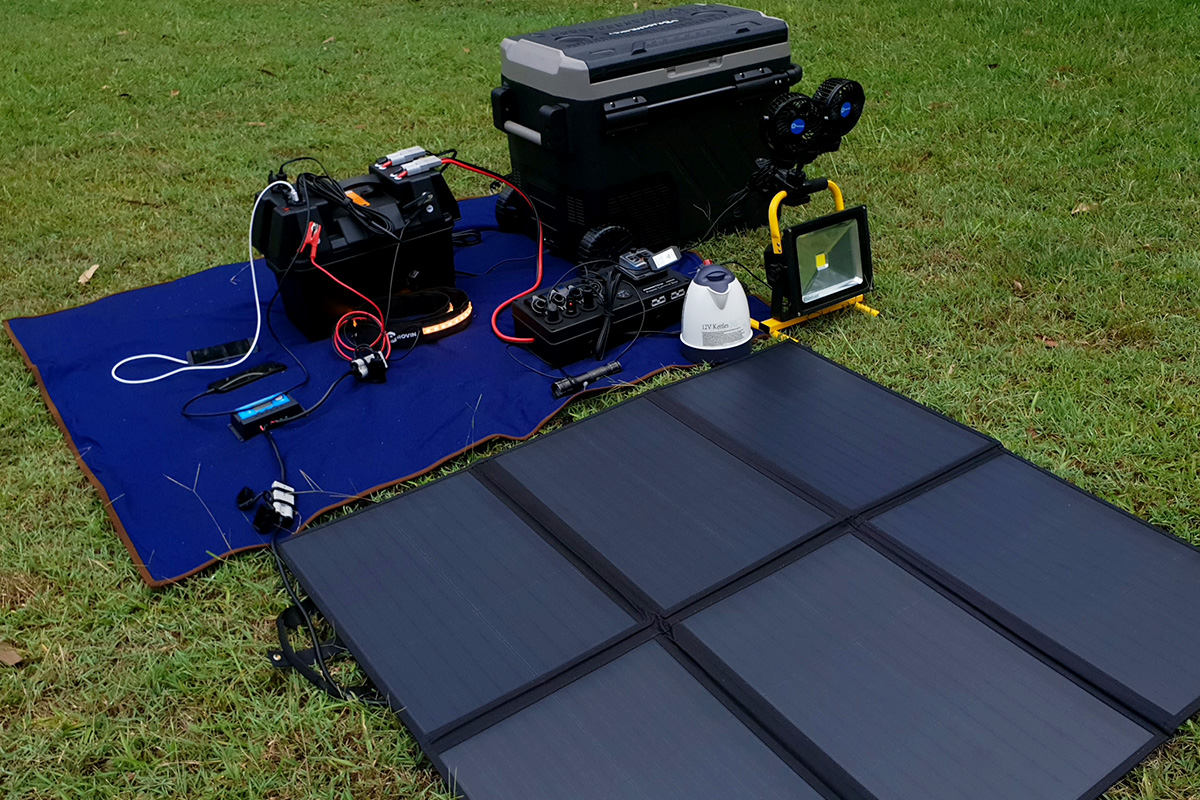
This is an example of how well you can load up a good battery and solar setup. It's the photo you saw as the title photo at the start. We have a 200W blanket solar panel with its included charge controller wired to the terminals of a battery box that has its own integrated outlets. The cigarette-lighter outlet is running an LED lighting strip (which has a mosquito-repellent colour function), while the USB is charging two phones. From one of the high-current connectors on the battery box, we are running a fridge, and from the other, a distribution box. The distribution box is running two floodlights, while the USB port is charging a torch. All we are really missing here is an inverter for mains power! However, that could be connected to one of the high-current connectors on the distribution box.
With careful thinking, many of these things do not need to be so close to the box, either. The solar blanket can be connected with a 5m or longer extension and placed on a vehicle bonnet or windscreen. The lights can run on long cables and be positioned under tarps and annexes or somewhere else more useful. Even the distribution box can be connected with a long high-current to high-current cable and be closer to your camp while the battery can be out at the edge.
Similar projects you may be interested in


