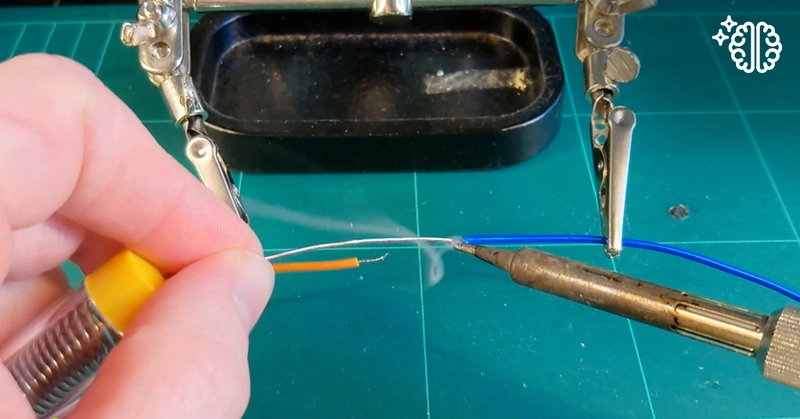
Learning to solder is a great way to help kids develop their motor skills and allow them to create and fix things.
Soldering is the process of melting metal very precisely to join two things together, both mechanically and electrically. Think of it as being like using metal as glue. You melt the solder with a soldering iron and make sure it ends up where you need it, so the two objects are joined.
People who work with electronics use solder to attach components to circuit boards and to complete circuits. Have you ever watched someone fix an old TV, connecting wires with solder to ensure they won't come apart? Getting started with soldering is easy but you will need a few things.
What you need
- Soldering iron and stand
- Solder – this is the metal you'll melt to join things together
- Pliers and clamps for holding things so you don't burn your fingers
- A clutter-free workspace
While that looks like a long shopping list, there are some great soldering iron starter kits available so you can get the tools you need to get started on your first project.
Safety tips
The tip of your soldering iron can get very hot – in excess of 400 degrees! Rather than holding the things you're going to solder with your hands, use pliers or clamps. Ensure clothes aren't loose fitting or made from easily combustible materials and that there's good ventilation.
There may be times when an extra hand is useful. That's why some clever spark created a third hand with a magnifier to help with some more precise jobs. It's also important to wear safety glasses just in case some hot solder is accidentally flicked.
Getting started
Each time you use a soldering iron you'll need to prepare it. This is called 'tinning'.
- Turn the soldering iron on and let it heat to its operating temperature.
- Clean the tip with a wet sponge and then let it heat up again.
- Touch the solder to the tip of the iron and let it flow around evenly.
Your first mini project: Joining two wires
Before embarking on a big project, it's a good idea to do a couple of simple tasks to get the hang of handling your soldering iron. Once you've prepared your iron, get two pieces of electrical cable and expose the wire by carefully removing the insulating coat.
- Use the soldering iron to heat one piece of the exposed wire for a few seconds.
- Keep the soldering iron in place and touch the solder to the wire. It will melt and coat the wire.
- Do the same thing to the other piece of wire.
- Hold the two pieces of wire together and touch them with the soldering iron. The solder you applied will melt, evenly coating the two wires and join them together.
- Let the wires cool naturally – rushing the process by blowing on them or dropping them in water will weaken the bond.
In this technique, you'll notice that the solder and soldering iron never came into contact. The iron is used to heat the wire which is then used to melt the solder. Repeat this a few times, so you get the hang of handling the iron and becoming precise with how you apply the solder.
Taking it further: Soldering on a circuit board
The same principles you learned with joining your wires apply to almost every soldering job. If you're adding a component to a printed circuit board, like an LED, you can follow these steps:
- Place the two wires coming from the LED into your board. Bending the wires will ensure they don't move or fall out of place while you're working.
- Heat area around the first hole with your soldering iron.
- Apply some solder to the heated joint and let it cool.
- Repeat this process with the second wire.
- Once you're sure it's all cooled and secure, you can snip off any excess wire.
A good solder joint should be bright and shiny with even coverage. With a bit of practice, you'll be creating your own inventions in no time.

